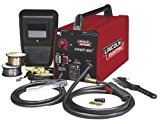
Lincoln Handy MIG is very good portable mid range mig welder. This unit plugs in anywhere to 110 v. 20 amps. and works great on light gauge steel. It doesn’t come with a gauge to see how much gas is left in the tank, but welder works well with the pre-adjusted regulator it comes with.
With the inert gas the machine holds a nice arc from 1/8″ to 3/8″ from the surface, welds are nice and smooth.
Handy MIG Welding Capabilities
Lincoln Electric K2185-1 has plenty of power for any home use. The machine has a 20% duty cycle and that is rare in this price range. But if you want to weld material thicker than 1/8″ you should look elsewhere.
And get a real welding helmet, as it comes with just a hand held face shield.
Dimensions 12.5 in.(H) x 11.25 in.(W) x 20.5 in.(D)
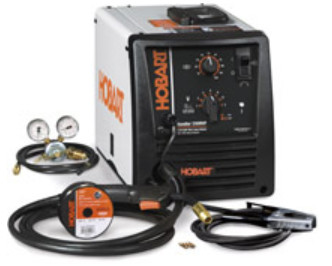
Comes with:
6.5 ft. power cord with plug, M-100 MIG gun and cable assembly, 10 ft. work cable with clamp,
Hook-and-loop cord wrapsArgon and AR/CO2 mix flow gauge regulator with gas hose.
Two contact tips for .030 in. (0.8 mm) wire
Hobart ® spool of .030 in. (0.8 mm) solid wire
Material thickness gauge 229895
Quick Select ™ drive rolls for .024 in. (0.6 mm) or .030/.035 in. (0.8/0.9 mm) solid wire, and .030/.035 in. (0.8/0.9 mm) flux-cored wire
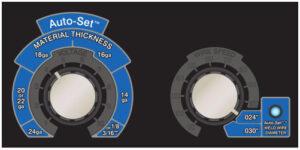
Auto-Set ™ operation mode
Auto-Set ™ operation mode sets welder to the proper parameters. It’s available for welding 24-gauge through 3/16-inch mild steel, and only works with .024 and .030 solid wires and C25 shielding gas (75% argon, 25% CO2).
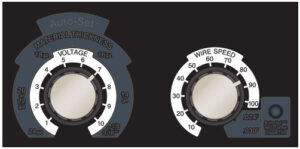
In Manual Mode you can set manually wiring speed (15–360 ipm) and Voltage/Material Thickness (about 8-27V).
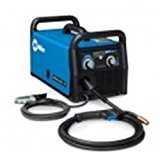
I really like it because you can use it at 115v and later expand from a shed to a workshop with larger service. And when you upgrade to 230V, you still retain the 110 portability. Besides, in my opinion, running welder from 240 will often make a great difference, 120V is in most cases a poor circuit to weld from.
The HH 210 MVP offers 7 taps (output voltages) and stepless speed controller for wire feed. So unit is easy to adjust for different thicknesses, wires and materials.
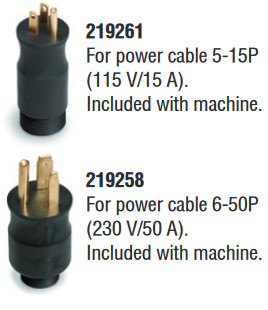
MVP – Multi-Voltage PlugHH 210MVP Control Panel
For 115V HH210MVP utilizes 4 voltage taps and 140A of weld output. For 230V – 210 amps of output and All 7 taps.
Pay attention that HH 210 is relatively heavy and not so easy to carry (net weight 79 lb) and 12-3/8in(H), 10-5/8in(W), 19-1/2in (D). I have to “grab and growl” when pick one. On the other hand, a light duty cart is all that’s needed to move it around the shop.
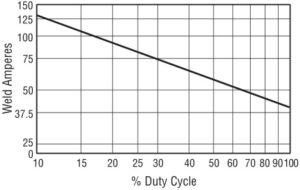
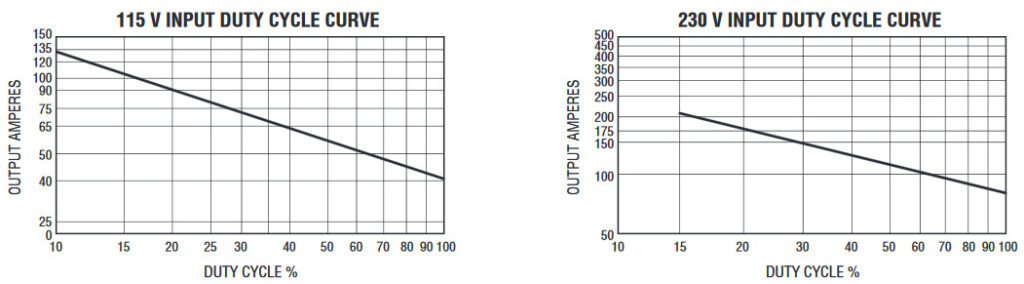
210MVP has much better (see the picture below) duty cycle and makes good single passes on 3/16″ and C25 gas. The lightweight ground cable and lightweight MIG gun may hinder the “210 amp” output.
More power is always better. You always can turn down the settings but if you don’t have the amps, you won’t be able to turn it up.
Handler® 210MVP duty cycle curves for 115V and 230V . 10% for 135ams (115V) and 35% for the same current (230V). Max current – 210 and 135 amps (115V and 230V relatively)100 Spool Gun – SpoolRunner™SpoolRunner for aluminum welding
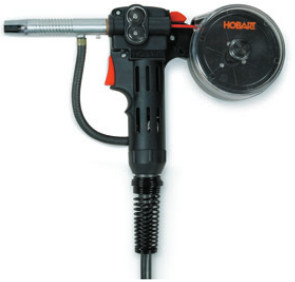
You can bought a spoolgun for aluminum that will easily burn holes in 3/16″ aluminum. It has 10 ft cable. Rated 150 amps, Includes carrying case and shipped with .030 in. and .035 in. contact tips.
Apply a tiny bit of silicone to the o-rings before assembly to ease seating the power pin and help avoid cutting an o-ring. The unit will make better welds.
Installing the SpoolRunner is easy – plug the power pin in
to the feedhead, attach the trigger lead, and flip the switch on the inside panel for spool gun operation.